
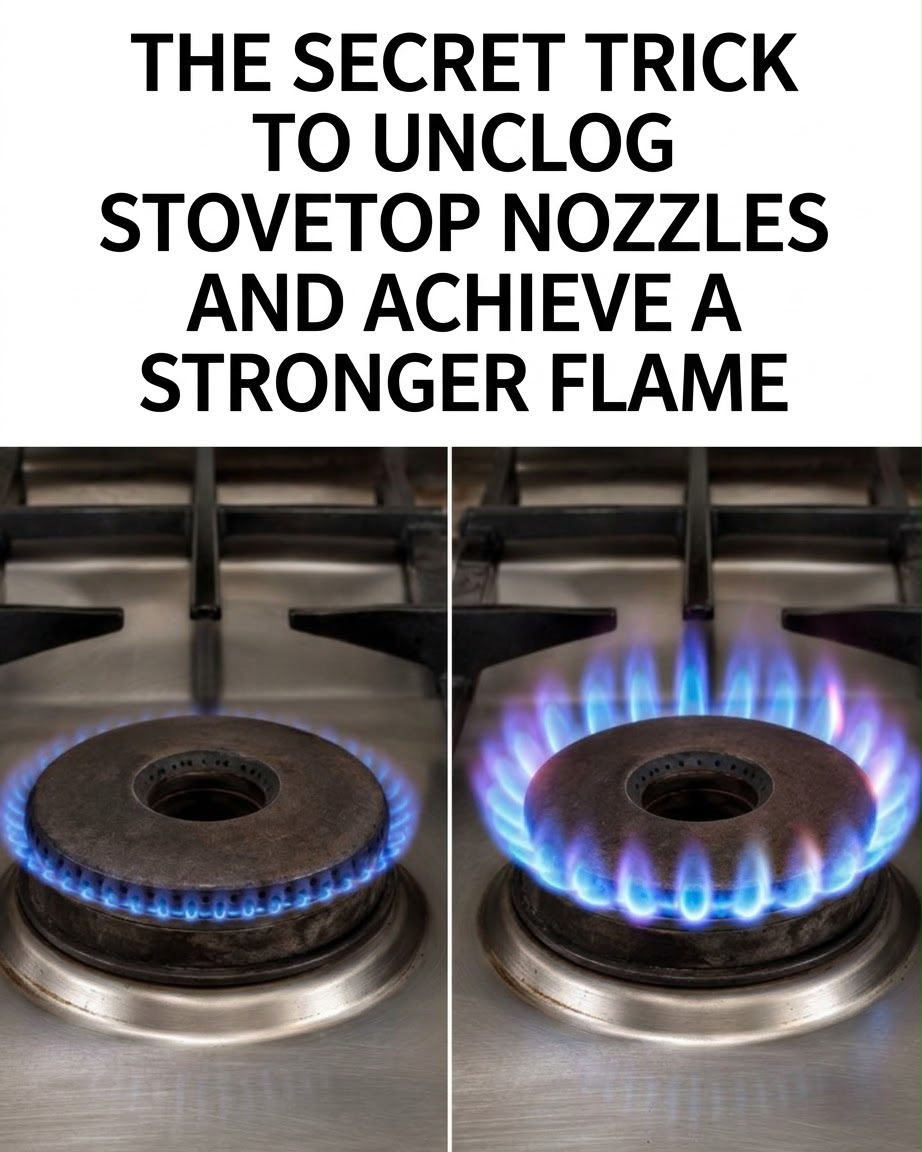
A high-performing gas stove is the heart of any modern kitchen. Whether you are searing meat, boiling pasta water, or simmering a delicate sauce, precise control over heat is essential for successful cooking. However, over time, many home cooks notice a frustrating drop in performance: the burner flame becomes weak, uneven, flickers continuously, or turns an inefficient yellow-orange color.
Before assuming your range needs an expensive repair technician, it helps to understand that weak gas flames are almost always caused by clogged burner nozzles, ports, or fuel orifices. During daily cooking, boiling liquids, grease splatters, food debris, and mineral deposits gradually accumulate inside tiny gas jet openings, restricting fuel flow and oxygen mixing.
In this complete step-by-step guide, we will explore why gas stove nozzles get clogged, how to safely clean burner heads and orifices using common household items, safety precautions to keep in mind, and how keeping your home appliances maintained protects your household safety and financial peace of mind.
Why Gas Stovetop Flames Become Weak or Orange
Understanding how a gas burner works helps diagnose why performance degrades over time. A standard gas stove relies on a precise balance of fuel (natural gas or liquid propane) and atmospheric air to produce a hot, efficient blue flame.
1. Grease and Food Residue Accumulation
Boil-overs from soups, pasta water, or frying fats are the leading cause of blocked burner ports. When liquid spills hit a hot burner, it bakes into a hard, carbonized crust that seals the tiny gas exit holes surrounding the burner cap.
2. Clogged Gas Orifice (Jet Nozzle)
Beneath the removable burner head lies a small brass fitting known as the gas orifice or jet nozzle. This fitting features a micro-opening that controls gas flow volume. Even a single particle of dried food, dust, or mineral residue can partially block this opening, causing a low, weak flame.
3. Dust and Lint Buildup in Air Shuttles
Gas burners mix gas with surrounding air prior to ignition. Over time, household dust, pet hair, and lint can accumulate around the air shutter or venturi tube under the cooktop, disrupting the optimal air-to-fuel ratio and causing weak, smoky orange flames.
Comparing Healthy vs. Problematic Gas Stove Flames
Recognizing the visual signs of your burner flame helps determine whether your stove requires cleaning or professional servicing.
| Flame Color / Appearance | Primary Diagnosis | Underlying Cause | Required Action |
| Crisp, Steady Blue Flame | Optimal Combustion |
Correct gas-to-air mixture & clean nozzles |
No action needed; standard maintenance |
| Low, Weak Blue Flame | Restricted Fuel Flow |
Clogged burner ports or blocked jet orifice |
Deep cleaning of burner head & nozzle |
| Yellow / Orange Flame | Incomplete Combustion | Dusty air shutters, grease buildup, or wrong air ratio | Clean air intake & scrub burner ports |
| Sputtering / Uneven Ring | Partial Port Blockage | Spilled food blocking specific port sections | Scrub perimeter burner slots thoroughly |
The Step-by-Step Trick to Unclog Stovetop Nozzles Safely
Restoring your stove’s flame to full strength requires minimal equipment and takes under 30 minutes.
Safety First: Preparation
-
Turn off Gas and Power: Ensure all burner knobs are turned completely to the OFF position. Unplug the stove from the electrical outlet or switch off its dedicated circuit breaker to disable electric igniters.
-
Allow Burners to Cool: Never attempt to clean a stove that was recently in use. Allow the grates and burner heads to cool completely to room temperature.
Step 1: Remove and Soak Burner Components
-
Lift off the cast-iron stovetop grates and remove the removable burner caps and burner heads.
-
Submerge the metal burner caps and heads in a basin filled with warm water, 1 cup of white distilled vinegar, and 2 tablespoons of degreasing dish soap. Let them soak for 15 to 20 minutes to soften grease deposits.
Step 2: Scrub Burner Ports with a Wire Brush or Toothbrush
-
After soaking, scrub the perimeter ports of the burner head using a stiff-bristled toothbrush or a fine wire brush.
-
Use a thin, unbent paperclip, safety pin, or sewing needle to gently poke through each individual port hole around the circumference of the burner ring, removing carbonized debris. Avoid using wood toothpicks, as they can break off inside tiny port holes.
Step 3: Unclog the Gas Jet Orifice (The Secret Trick)
-
Locate the small brass orifice fitting exposed in the center burner base after removing the burner head.
-
Take a thin metal needle or fine guitar string (an unwound ‘E’ string works exceptionally well) and gently insert it straight down into the brass orifice hole.
-
Twist lightly to dislodge dust or dried residue blocking the orifice opening, then remove the needle carefully. Avoid forcing thick metal tools into the orifice, which could enlarge or deform the brass opening.
Step 4: Dry Thoroughly and Reassemble
-
Shake out excess moisture from burner heads and dry them completely using a micro-fiber towel or warm hair dryer. Moisture trapped inside gas ports will prevent ignition or cause temporary sputtering.
-
Reinstall the burner heads, align burner caps flat on their bases, and place cast-iron grates back in position.
-
Reconnect electrical power, turn on the gas valve, and ignite the burner to test for a strong, even blue flame ring.
Home Maintenance, Appliance Safety, and Financial Planning
Maintaining major home appliances like gas ranges extends beyond cooking convenience—it directly impacts home safety and property protection.
Preventing Gas Leaks and Carbon Monoxide Hazards
A yellow, sputtering flame is a classic indicator of incomplete gas combustion, which produces elevated levels of carbon monoxide (CO) gas indoors. Keeping burner nozzles clean ensures complete, safe fuel combustion and healthy indoor air quality.
Protecting Homeowners Insurance and Property Value
Proper maintenance of kitchen appliances minimizes risks of grease fires or gas line malfunctions. While homeowners insurance protects your property against sudden accidental fire damage, insurance providers expect home owners to maintain basic safety standards. Maintaining clean, efficient appliances protects your long-term real estate investment, supports your household finance stability, and keeps your living space safe.
Ensuring family safety goes hand in hand with proactive personal planning. Securing comprehensive health, property, and life insurance coverage provides long-term peace of mind, protecting your home, family, and financial future against life’s unexpected events.
Fascinating Facts About Gas Stoves and Flames
-
Why Is Blue Hotter Than Yellow? A blue flame indicates complete hydrocarbon combustion reaching temperatures of approximately 3,500°F (1,980°C). A yellow flame indicates incomplete combustion at cooler temperatures of around 1,800°F (1,000°C), producing unburned soot particles.
-
The Invention of Gas Cooking: The first commercially successful gas stove was developed in England in the 1830s by inventor James Sharp, revolutionary transforming domestic meal preparation.
-
Self-Cleaning Orifices: Modern high-end gas cooktops utilize stainless steel or nickel-plated jet nozzles engineered to resist corrosion and chemical clogging caused by acidic cooking liquids.
-
Natural Gas Odorant: Natural gas is naturally colorless and completely odorless. Gas utility companies add a harmless chemical compound called mercaptan (which smells like rotten eggs) so that homeowners can immediately detect tiny gas leaks.
Conclusion: Enjoying Peak Cooking Performance
A weak or sputtering gas stove flame does not mean you need a new range or an expensive service visit. In almost all cases, a quick 20-minute cleaning of burner ports and the central jet orifice restores full gas flow and delivers a blazing, efficient blue flame ring.
By incorporating simple appliance maintenance into your routine, practicing basic safety steps, and keeping your kitchen running efficiently, you can enjoy better cooking control, lower gas bills, and peace of mind in your home.
Frequently Asked Questions
What tool is safest for cleaning a gas stove orifice?
A fine, flexible metal needle, thin safety pin, or an unbent fine guitar string (0.009 to 0.011 gauge) is safest for cleaning a brass gas orifice. Avoid forcing thick nails or drill bits into the orifice, as enlarging the brass opening will ruin the air-gas mixture ratio.
Can I use oven cleaner to soak gas stove burner caps?
It is best to avoid harsh chemical oven cleaners on aluminum burner components because strong sodium hydroxide can corrode or discolor aluminum alloys. Stick to warm water, dish soap, white vinegar, or baking soda paste for soaking burner parts.
Why does my gas stove click continuously after cleaning?
Continuous clicking usually occurs when moisture gets trapped around the spark igniter electrode during cleaning. Turn off power to the stove and allow the igniter area to dry thoroughly for a few hours, or dry it gently with a warm hair dryer, and the clicking will stop.
How often should I deep clean my gas stovetop nozzles?
Deep cleaning gas nozzles and burner ports every 3 to 6 months—or immediately following major liquid boil-overs—keeps fuel lines clear, prevents carbon buildup, and ensures consistent flame performance.
Is an orange gas flame dangerous?
An occasional orange flash caused by ambient dust or high humidity (such as running a room humidifier) is harmless. However, a persistent, bright yellow or orange flame accompanied by soot buildup indicates incomplete combustion and elevated carbon monoxide production, requiring immediate nozzle cleaning and air shutter adjustment.
